You can create a message on the panel by clicking here.
The panel lets you create and send messages that are 100% customizable to your needs.
Starting menu for writing your message
At the top of the editor, you first choose the format of your message:
Embeds: the classic format, described below. You compose your message with content, embeds, images, buttons and selectors.
Advanced: a more flexible format, based on Discord's V2 components, detailed in the Advanced mode section.
Switching format resets the content you are writing. This action cannot be undone; a confirmation is requested as soon as there is content to lose.
For the Embeds format, you add text, images or content using the Content, Image and Embed buttons.
The Button and Selector buttons let you create an interactive experience for your members. To learn more about how they work, see the interactions section!
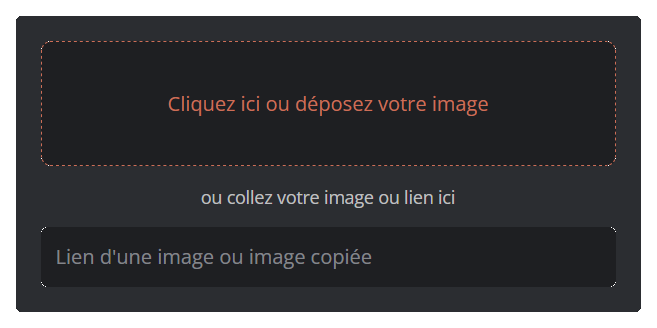
By pressing the Image button, you can add an image directly to your message. Clicking it lets you choose whether to import an image from your device or from a link.
The image selector with the description and spoiler options
Two options are available for each image:
Description (alt text): a text describing the image. It improves accessibility (screen readers) and is displayed if the image cannot be loaded. The description is limited to 1024 characters.
Spoiler: hides the image behind a veil. Your members have to click it to reveal it.
You can also group several images in a gallery, up to 10 images: Discord then displays them side by side as a grid.
The supported image types are: png, jpg, jpeg, gif, webp.
By pressing the Embed button, you can write a detailed message gathering several pieces of information.
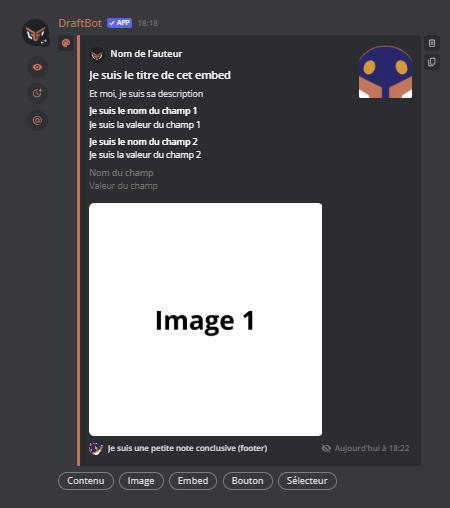
Compare the difference between the editing view and the final rendering here
Here is what each text area means:
Author name: you can put text here to introduce the author, your username or the name of your server.
Title: you can enter your embed's title. You can also add a link easily with the button that appears when you write.
Description: this is where you put the body of your message. Discord Markdown (bold, italic, etc.) can be used in this area.
You can put up to 4096 characters in the description.
Fields: you can insert several organized text areas here (title and content). "Field" blocks are separated from each other by a larger line spacing.
Field name: the text in this area appears in bold.
Field value: this is a text area, you can fill it however you like.
The number of fields is limited to 25 per embed. The "Value" part of a field can contain up to 1024 characters.
You can also reorder your fields and change their alignment (vertical or horizontal) by clicking the button that appears when you fill in a field.
Footer: you can add a text to close your message. It is displayed very small, at the bottom of your embed.
Timestamp: by pressing the button, you can choose whether the message's sending time appears at the bottom of the embed.
Images: the orange boxes are areas where you can insert an image. Clicking them lets you choose whether to import an image from your device or from a link. An embed can display up to 4 images as a gallery.
Your message as a whole cannot contain more than 6,000 characters.
Several buttons sit to the right and left of the embed editor:
: lets you change the color of the bar to the left of the embed. You can also choose No color: in that case, Discord automatically applies a color suited to the theme (light or dark) of each person reading the message.
: lets you duplicate your embed easily. The copy created appears just below the first one.
When your message contains mentions (a member, a role, @everyone or @here), the Mentions button lets you control precisely who is actually notified. This is handy for writing a mention without sending a notification to everyone.
Configuration menu for the message's mentions
Only the mentions already present in your message's text appear in this menu. This setting is not there to add mentions, but to decide which ones trigger a notification.
For roles as for members, you can choose between three modes:
None: the mention is displayed but notifies nobody.
All: every mention of that type notifies the people concerned.
Selected: you pick precisely which roles or members are notified.
Two options are also available:
Allow @everyone and @here: enable this if you want these global mentions to notify members.
Silent message: the message is sent without notification (no sound, no push notification). Members only see an unread message badge, even if they are mentioned.
Mentions placed in an embed never trigger a notification, whatever this setting.
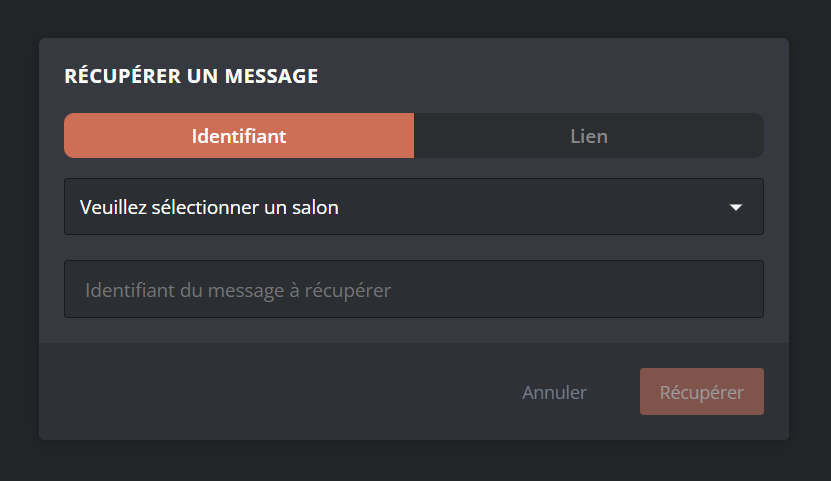
You can retrieve a message by pressing the orange Retrieve a message button in the top right corner of the page. A menu then appears to find the message through the message ID and its original channel. You can also find the message through the message link.
Menu for retrieving a message sent with DraftBot
You cannot retrieve a message that has been deleted from the channel.
A message sent in the Advanced format reopens directly in the Advanced editor: if the editor is in Embeds mode at retrieval time, it switches automatically. You will be able to edit it, but Discord does not allow it to be converted back to the Embeds format.
Once your message has been retrieved, you can edit it however you like.
Advanced mode (based on Discord's V2 components) is a message format available from the panel's editor. Instead of the fixed structure of embeds, it offers a system of blocks you assemble and reorder freely: you stack text, images, separators, buttons and selectors in the order of your choice, and you can group them in colored containers.
This format is well suited when the Embeds format holds you back: for a free layout, several image galleries, or blocks pairing a text with a thumbnail or a button.
To enable it, use the format selector at the top of the editor and choose Advanced.
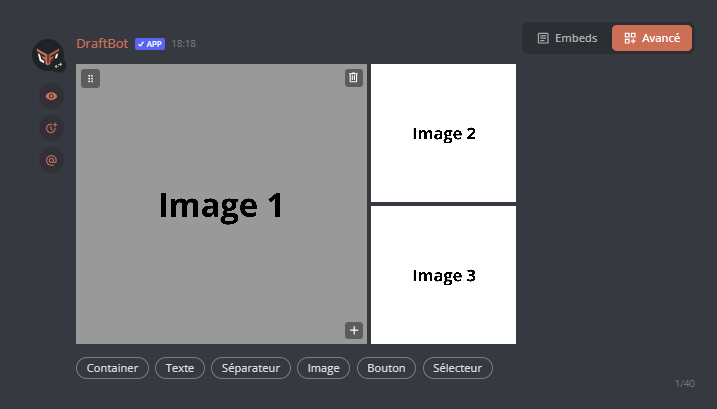
The message editor in Advanced mode
Switching between Embeds and Advanced resets the content in progress: this action cannot be undone. A confirmation is requested as soon as there is content to lose.
Discord does not allow a message already sent in Advanced mode to be converted back to the classic format. In practice:
a message sent in Embeds and then edited in Advanced is converted for good: you will not be able to switch it back to Embeds;
a message sent in Advanced can only be edited in Advanced. If you switch the editor back to Embeds, sending creates a new message instead of editing the old one.
As in the Embeds format, the Mentions button remains available in Advanced mode: you control who is notified and you can send a silent message (see Mentions).
A button bar lets you add the following blocks to your message:
The block bar of Advanced mode
Every block can be reordered by drag and drop (including into or out of a container) and can be duplicated or deleted. A message cannot exceed 40 components.
A simple text block. Discord Markdown (bold, italic, etc.), emojis and timestamps can be used there. You can add several text blocks to the same message.
From a text block, you can also add an image (as a thumbnail) or a button to its right.
Adds one or more images as a gallery, arranged automatically in a grid. A gallery can contain up to 10 images. As in Embeds mode, each image can be given a description (alt text, 1024 characters maximum) and marked as a spoiler.
The container (Container button) groups several blocks (text, images, separators, buttons, etc.) inside a frame, in the manner of an embed. You can give it an accent color (the colored bar on the left) or none at all, and hide its whole content behind a spoiler.
Buttons and selectors trigger the same actions as in Embeds mode. You can lay them out in rows: a row accepts up to 5 buttons, while a selector takes up a row on its own.
You can create buttons and selectors that the members of your server can use. These buttons and selectors trigger actions you have programmed beforehand (adding roles, sending a message or interacting with DraftBot features). You can also set conditions for certain interactions. They work in the Embeds format as well as in Advanced mode.
For a message containing one (or more) interaction(s) to work, it has to be saved on the panel.
You can save up to 5 messages on the panel. On premium servers, this limit rises to 200.
A selector is a button displaying a dropdown menu when clicked. Each line of that menu can trigger a separate action.
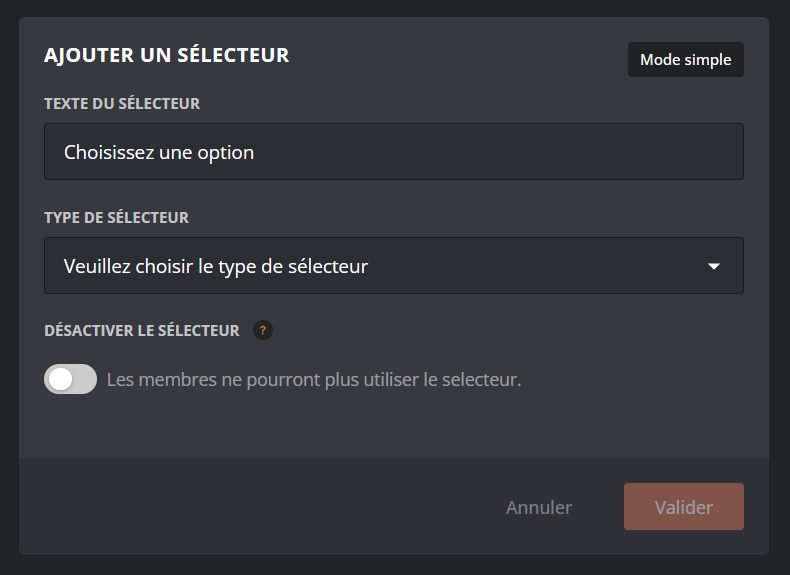
Menu for configuring a selector
To create an interactive selector, click the button named Selector. You can set the text displayed on your selector (by default: "Choose an option"). Then you can choose between two selector modes:
Simple mode: every option of the selector triggers the same type of action among:
Sending ephemeral messages
Adding and removing roles
Opening tickets
Buying shop articles
Advanced mode: you can configure a different type of action for each option of the selector, among:
Send a new message
Send a saved message
Add and remove roles
Open a ticket
Buy an article
Submit a suggestion
Simple mode is ideal for allowing several choices within the same action, for example selecting a role to obtain from a list.
Advanced mode is ideal for messages that need to do several different things from the same place, for example choosing a role OR displaying an ephemeral message for more information.
Here are the different actions you can attach to a button or to a selector option.
Most of these actions can be restricted so that they only work under certain conditions. For example, you can reserve an action for members holding a certain role.
This action sends a new message automatically through DraftBot.
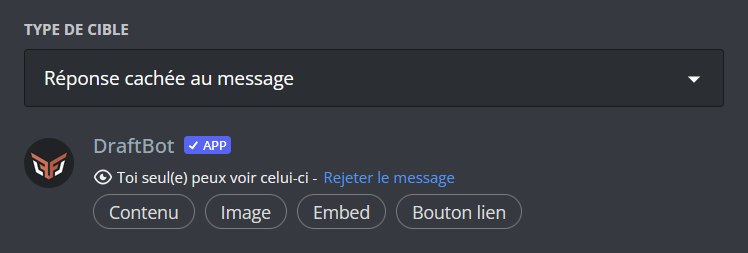
In the "Target type" menu, you can choose how the message is sent:
Hidden answer to message: an ephemeral message only visible to the user who triggered the action.
In a channel: DraftBot posts the message in the channel of your choice. (you have to choose the target channel in the "Message sending channel" section).
Private message: DraftBot sends the message directly to the user, in their direct messages.
Once your choice is made, you can create your message using the editor included directly in the selector's configuration menu:
You can write your message here.
If you have already written and saved a message, this action sends it when the button is clicked. Once the message has been selected, you can set how to send it ("hidden answer", "in a channel" or "private message").
With this action, you can let users assign or remove roles themselves by simply interacting with the message. DraftBot lets you choose between several styles of behavior for this action:
Classic: when the user clicks the button, DraftBot gives them the matching role, or removes it if they already have it.
Fix: when the user clicks the button, DraftBot gives them the matching role, but once the role has been obtained, clicking the button again does not remove it.
This option is particularly suited to situations where you do not want to let members change their mind.
Unique: the user can only have one role among those offered by the message. If they choose another button granting another role, their previous role is removed.
You then have to set which roles are granted or removed (you have to set at least one). A checkbox lets you set whether the role is applied temporarily or not. If the role is temporary, you have to set how long the user keeps it before it is removed automatically.
When triggered by the button, this option makes the user immediately buy a predefined shop article. To do so, you have to set the article to be bought. It is bought at the price set in the Shop module.
When a user clicks this button, DraftBot carries out the purchase immediately if the user has the necessary amount. No confirmation is requested beforehand.
With this action, DraftBot lets you make suggestions easier to reach with a single click on a button. You can choose whether interacting with this button opens the user's main suggestions menu, or the form for creating a new suggestion directly.
A message profile is a fictional user in its own right, which you can use to send messages.
An inspiring message from a fictional user…
You can open the profiles by clicking DraftBot's profile picture.
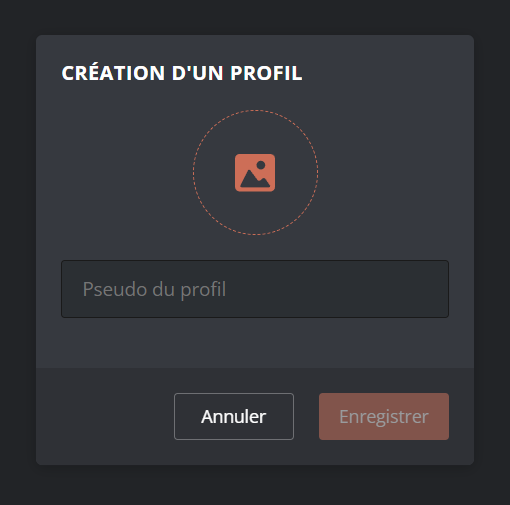
Once in the menu, new profiles can be created through the button.
Menu for adding a new profile
You can then import a profile picture or provide the link to an image. You also have to add a username.
Once your profile has been created, it can be used when designing your messages, whether through the panel or the /say and /embed commands.
You can find the link to a server's profile picture using the /info server command, or /avatar for a member.
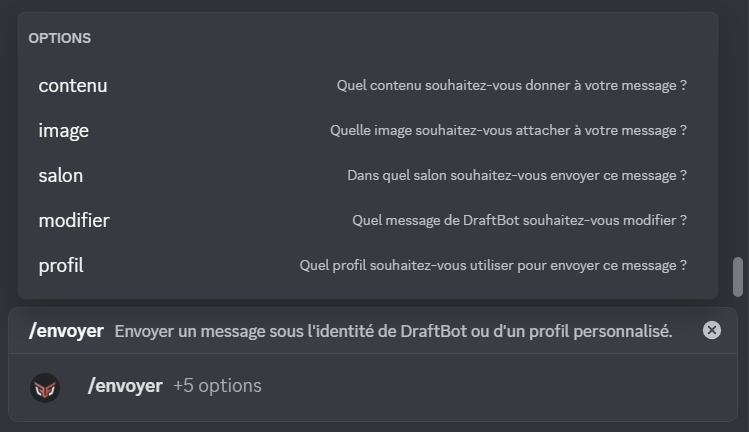
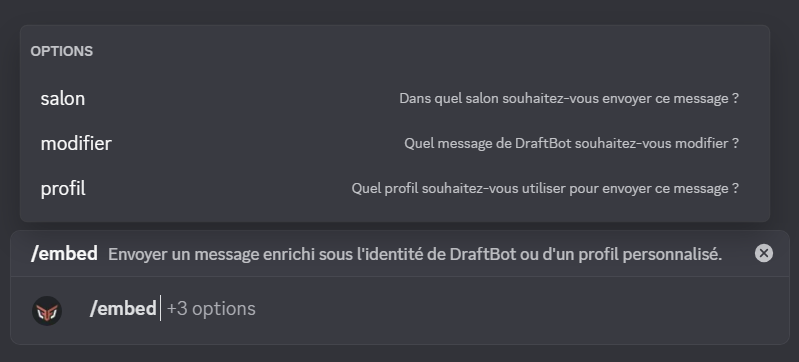
As well as the panel, two commands let you send a message directly from Discord, without opening the dashboard. These commands use the classic Embeds format.
With this command, you can quickly send a message in a channel of your server. To use it, you need the Administrator permission or an override allowing you to use the command.
The /say command with its arguments
Here is what these parameters mean:
content: the text for DraftBot to say, as a classic message.
picture: you can attach an image to your message.
channel: which channel should DraftBot send the message to? Leave it empty if it is the same channel as the one you are running the command from.
edit: if you want to edit a message, use this extra field and include the link of the message to edit.
The /embed command with its sending parameters
Here is what these parameters mean:
channel: which channel should DraftBot send the message to? Leave it empty if it is the same channel as the one you are running the command from.
edit: if you want to edit a message, use this extra field and include the link of the message to edit.
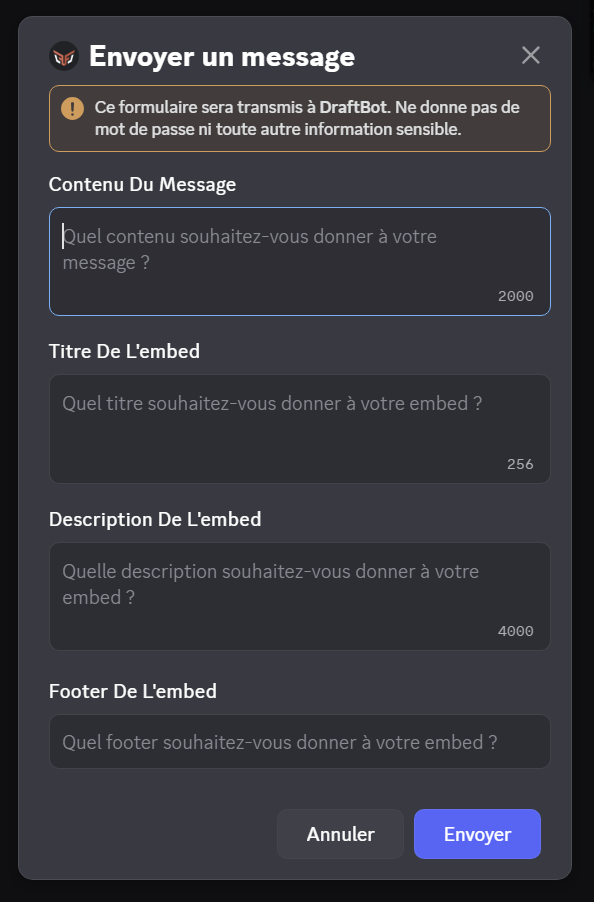
Once the command has been run, a menu appears. It is in this menu that you write your message.
Menu that appears once the command has been run
Each text area matches a type of content:
Content:DraftBot's text appears as a classic message.
Embed title: this is your embed's title.
Embed description: the text of your embed goes here.
Embed footer: you can add a small text at the bottom of your embed.
Deleting the embed cannot be undone: if you click the Embed button again after deleting it, a new empty embed appears.

 button. These times automatically adapt to the time zones of your server's users.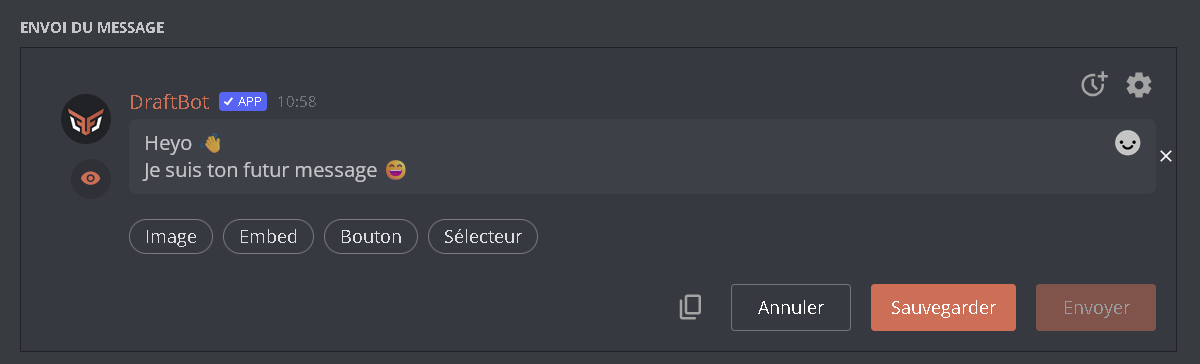
 button that appears when you write.
 button that appears when you fill in a field.
 button, you can choose whether the message's sending time appears at the bottom of the embed.
 : lets you change the color of the bar to the left of the embed. You can also choose No color: in that case, Discord automatically applies a color suited to the theme (light or dark) of each person reading the message.
 : lets you duplicate your embed easily. The copy created appears just below the first one.
 : lets you delete the associated embed.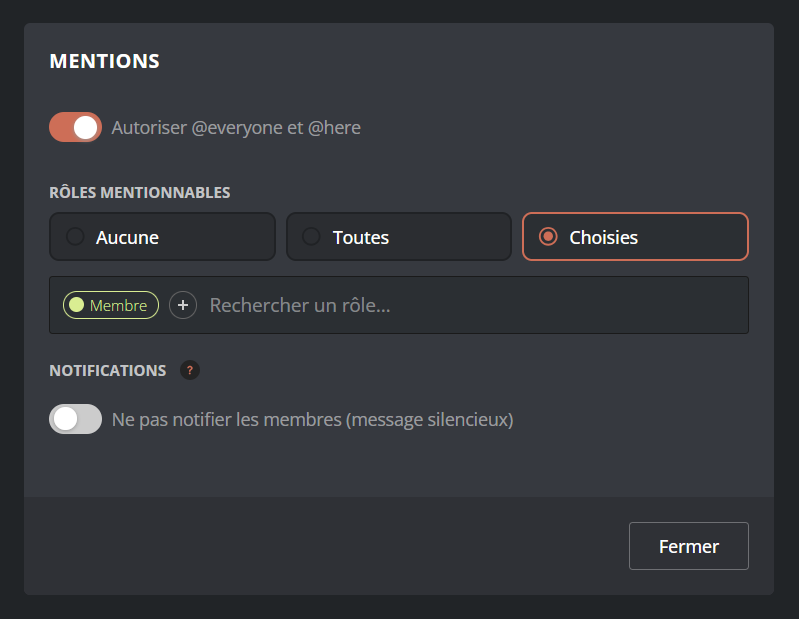



 servers, this limit rises to 200.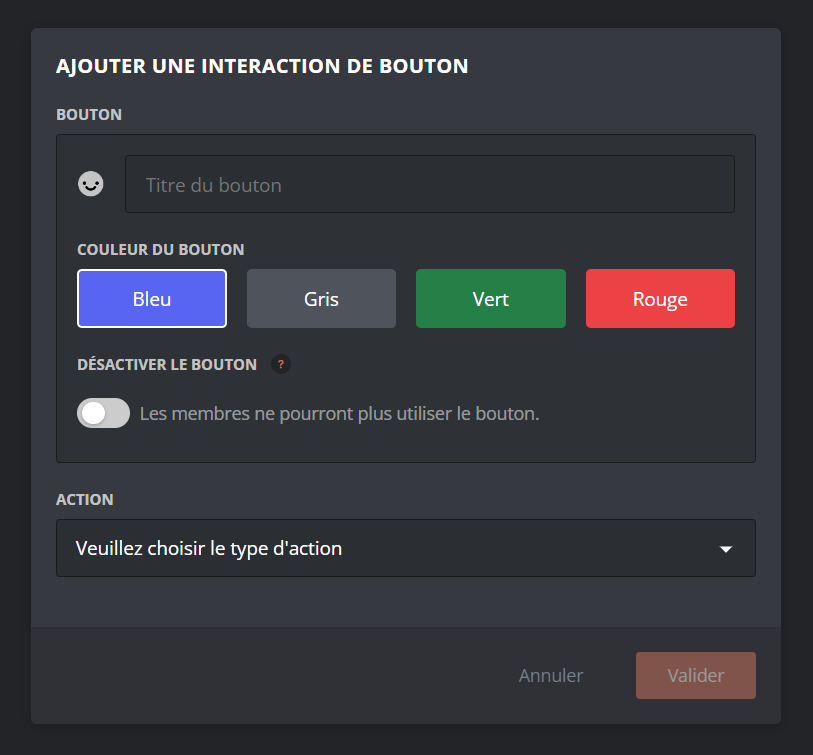

 button.